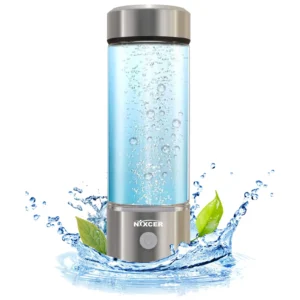
You’ve invested in a hydrogen water bottle—maybe even the high-performance Nixcer Pro hydrogen water bottle—but how do you know it’s actually delivering the molecular hydrogen it promises? With hydrogen gas dissipating within hours and many devices making bold claims, testing isn’t just recommended—it’s essential. This comprehensive guide walks you through every method available to test hydrogen water concentration at home, from affordable blue reagent drops to professional-grade digital meters, helping you verify your device performs as advertised and your wellness investment delivers measurable results.
Why Testing Your Hydrogen Water Matters
Most people buy hydrogen water bottles based on manufacturer claims alone, assuming the device works as promised. However, research shows hydrogen concentration can vary dramatically between products, and even the same device can perform differently based on water source, maintenance, and usage patterns. Testing transforms assumptions into certainty.
The Hydrogen Dissipation Problem
Molecular hydrogen is remarkably unstable in water. Unlike dissolved minerals that remain indefinitely, hydrogen gas actively escapes from liquid, with concentration dropping significantly within 1-2 hours in sealed containers and mere minutes in open containers. This rapid dissipation means timing matters immensely. A bottle generating 4000 PPB initially might offer only 1500 PPB an hour later, substantially reducing potential wellness benefits. Regular testing helps you understand your device’s actual delivery within practical usage windows.
Verifying Device Performance
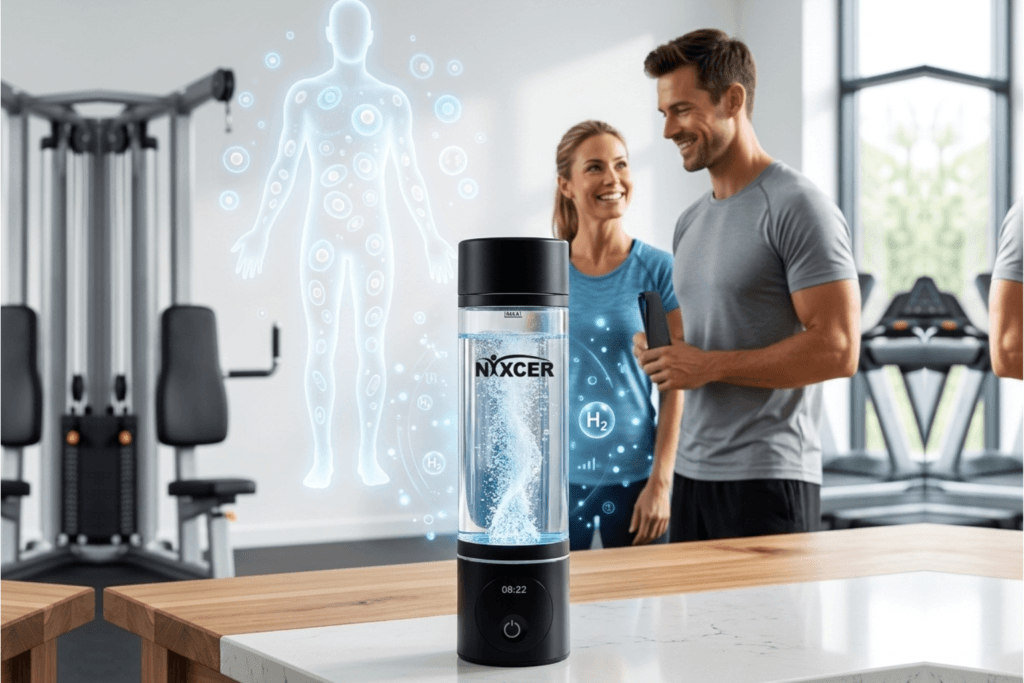
Not all hydrogen bottles perform as advertised. Independent testing reveals many products generate far less molecular hydrogen than claimed, with some producing virtually zero measurable H2. Testing provides objective evidence your device works correctly, helps identify maintenance needs like electrode cleaning, and validates whether your specific unit matches published specifications. For premium devices like the Nixcer Pro claiming 8000 PPB output, verification ensures you receive the performance you paid for.
Maximizing Your Health Investment
Hydrogen water bottles range from $30 basic models to $200+ premium devices. Whether targeting athletic recovery, general wellness, or specific health goals, hydrogen concentration directly impacts effectiveness. Testing ensures therapeutic levels, confirms your chosen device meets your needs, and helps you make informed decisions about upgrades or replacements. When investing $90-130 in a Nixcer Pro, verification that you’re actually receiving 4000-8000 PPB concentrations justifies the premium pricing.
Understanding Hydrogen Water Concentration Levels
Before testing, understanding measurement units and therapeutic ranges provides context for interpreting results.
PPM vs PPB: What Do These Numbers Mean?
Hydrogen water concentration uses two interchangeable units. PPM (parts per million) measures milligrams of hydrogen per liter of water, while PPB (parts per billion) measures micrograms per liter. The conversion is simple: 1 PPM equals 1000 PPB. When you see a device claiming “3000 PPB,” that equals 3 PPM or 3 milligrams of hydrogen per liter. Most consumer devices rate performance in PPB because the numbers appear more impressive, but both measurements represent identical concentrations. The Nixcer Pro’s 8000 PPB output translates to 8 PPM, placing it at the top of consumer device capabilities.
Therapeutic Concentration Ranges
Research on hydrogen water typically uses concentrations between 0.5-1.6 PPM (500-1600 PPB) as therapeutic baselines. Studies suggest benefits begin around 0.5 PPM, with optimal effects often observed between 1.0-1.6 PPM. Higher concentrations don’t necessarily provide proportionally greater benefits due to saturation limits, but they offer advantages for immediate consumption and account for rapid hydrogen dissipation. Devices producing 3000+ PPB ensure therapeutic levels remain even after 30-60 minutes of storage, providing practical flexibility for real-world usage.
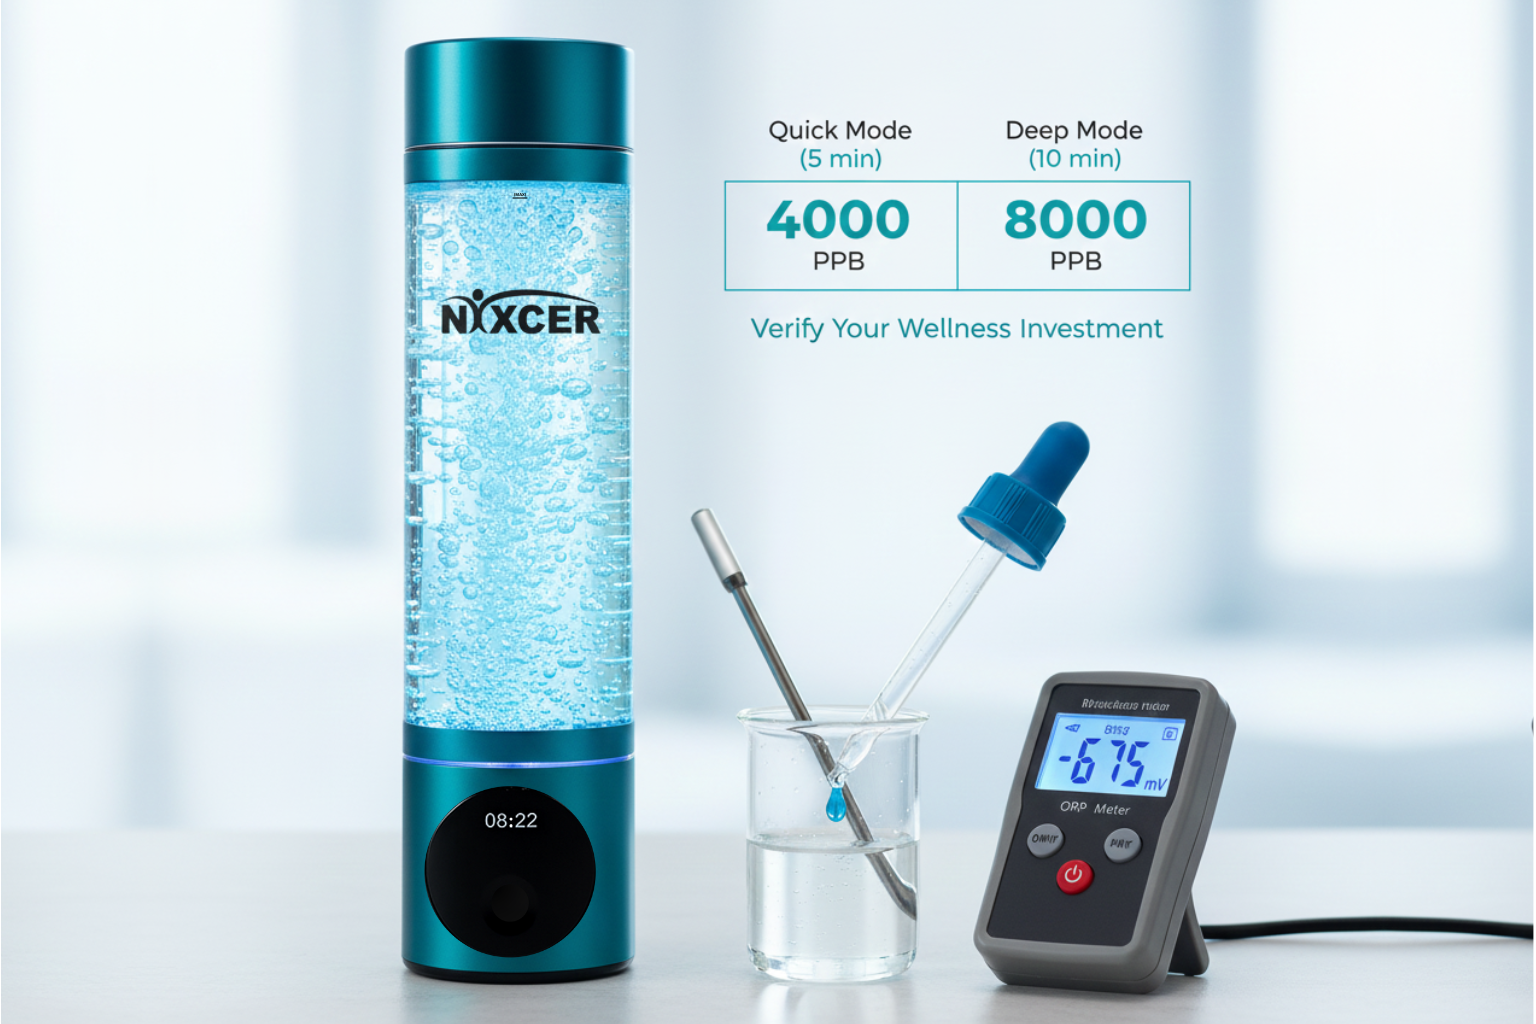
What the Nixcer Pro Delivers
The Nixcer Pro hydrogen water bottle offers two operational modes targeting different needs. Quick Mode runs 5 minutes generating approximately 4000 PPB—well above therapeutic thresholds and suitable for immediate consumption. Deep Mode extends to 10 minutes, producing up to 8000 PPB maximum concentration. This dual approach balances convenience with maximum performance. The 4000 PPB quick mode already exceeds most competitors’ maximum output, while the 8000 PPB deep mode provides extraordinary concentrations for users seeking maximum benefits. These levels maintain therapeutic ranges even after 1-2 hours storage, unlike lower-output devices whose concentration drops below effective thresholds quickly.
The 3 Main Methods to Test Hydrogen Water
Home testing options range from simple visual confirmation to precise quantitative measurement. The three primary methods vary in accuracy, cost, and convenience. Blue reagent drop testing offers the best balance of affordability and reliability for most users, providing quantitative measurements at reasonable cost. Digital hydrogen meters deliver instant readings with minimal effort, though quality varies significantly between models. ORP meters provide indirect indicators of hydrogen presence but cannot accurately measure concentration. Each method serves different priorities, and understanding their strengths and limitations helps you choose the approach matching your needs and budget.
Method 1: Blue Reagent Drop Testing (H2Blue)
Blue reagent testing represents the most widely recommended method for home hydrogen water testing, offering quantitative measurements at accessible cost with reasonable accuracy.
How Blue Reagent Testing Works
Blue reagent testing uses methylene blue chemistry in a process called titration. The reagent contains methylene blue molecules that react with dissolved hydrogen gas, creating colorless fluoroethylene blue. When you add reagent drops to a measured water sample, the blue color disappears as long as hydrogen molecules remain available to react. Once all hydrogen is consumed, additional drops stay blue—signaling the titration endpoint. By counting drops required to reach this point, you calculate the precise hydrogen concentration. Each drop typically represents 100 PPB (0.1 PPM), making calculation straightforward.
The chemistry relies on a one-to-one molecular reaction between hydrogen and methylene blue in the presence of colloidal platinum catalyst. This specificity ensures the test measures actual dissolved H2 rather than other substances. However, the reagent is sensitive to oxidation, and exposure to air, light, and contamination gradually reduces effectiveness. Proper storage in cool, dark conditions and tight sealing after use maintains reagent reliability.
Step-by-Step Testing Process
Equipment needed: H2Blue reagent kit (available from various suppliers), 6ml graduated test beaker (usually included), glass dropper (included), stirring rod, gloves and protective eyewear (recommended).
Testing procedure:
- Generate hydrogen water using your device. For the Nixcer Pro, complete either a 5-minute (quick mode) or 10-minute (deep mode) cycle.
- Immediately pour exactly 6ml of freshly generated hydrogen water into the clean, dry graduated beaker. Speed matters—hydrogen begins escaping immediately upon exposure to air.
- Add reagent drops slowly, one at a time. Each drop should fall into the center of the beaker. Pause 2-3 seconds between drops.
- Stir gently after each drop using the stirring rod. Use smooth, circular motions without creating bubbles or splashing, which accelerates hydrogen loss.
- Observe color changes. Initially, blue drops immediately turn clear as hydrogen neutralizes the reagent. Continue adding drops and stirring until the water no longer clears—remaining persistently blue even after stirring. This indicates the titration endpoint.
- Count total drops used before the endpoint. If it took 40 drops before the water stayed blue, you’ve found your measurement point.
- Clean equipment immediately after testing. Rinse beaker and stirring rod thoroughly with fresh water to prevent methylene blue residue affecting future tests. Even trace amounts cause inaccurate subsequent readings.
Calculating Your Results
Calculation is simple multiplication. Each drop of H2Blue reagent represents 100 PPB of dissolved hydrogen in a 6ml sample. Multiply your drop count by 100 to determine total concentration.
Example calculations:
- 15 drops × 100 PPB = 1500 PPB (1.5 PPM)
- 40 drops × 100 PPB = 4000 PPB (4.0 PPM)
- 80 drops × 100 PPB = 8000 PPB (8.0 PPM)
For the Nixcer Pro, expect approximately 40 drops (4000 PPB) in quick mode and 80 drops (8000 PPB) in deep mode under optimal conditions. Lower readings may indicate water quality issues, device maintenance needs, or testing technique problems rather than device defects.
Pros and Cons of Blue Drop Testing
Advantages: Provides quantitative measurements with reasonable accuracy (±10-15%), relatively affordable ($25-40 for kit lasting 400+ tests), widely available online, no calibration required, simple calculation, works across full therapeutic range (0-8000+ PPB), no battery or electronic components to fail.
Limitations: Requires careful technique to minimize hydrogen loss during testing, reagent degrades over time (6-12 month shelf life once opened), methylene blue is toxic requiring safety precautions, counting drops can be tedious (80 drops for 8000 PPB), manual process takes 5-10 minutes per test, results affected by water temperature and dissolved oxygen levels, cannot measure hydrogen in sealed containers without releasing gas.
Blue reagent testing remains the gold standard for home use, offering the best combination of accuracy, affordability, and accessibility for consumers needing to verify device performance.
Method 2: Digital Hydrogen Meter Testing
Digital hydrogen meters provide instant electronic readings, eliminating manual drop counting and calculations. However, quality varies dramatically between models, and proper technique remains essential.
How Digital Meters Work
Digital hydrogen meters use electrochemical sensors containing specialized electrodes that react with dissolved hydrogen gas. When the sensor contacts hydrogen-rich water, a measurable electrical current proportional to hydrogen concentration generates, which the device converts to PPM or PPB readings displayed digitally. Most consumer meters use either galvanic or polarographic sensor technology, both requiring periodic calibration to maintain accuracy.
The sensor typically resides at the probe tip, requiring submersion in the test sample. Better meters include temperature compensation since hydrogen solubility varies with temperature, and automatic calibration features that adjust for sensor aging. Lower-quality meters often lack these refinements, producing inconsistent or inaccurate readings. The metallic sensor pin’s limited surface area can struggle capturing hydrogen in high-concentration water, sometimes maxing out around 1300-1500 PPB even when higher concentrations exist.
Step-by-Step Testing Process
- Power on the meter and verify sufficient battery charge. Low batteries produce unreliable readings.
- Select measurement unit (PPB or PPM) according to preference. Most meters offer both options.
- Allow the meter to stabilize. Initial power-on readings often fluctuate for 30-60 seconds before settling to baseline (typically 0-20 PPB for regular water).
- Generate fresh hydrogen water in your device. Complete a full cycle with the Nixcer Pro (5 or 10 minutes depending on mode).
- Immediately immerse the sensor probe into the water, ensuring complete submersion to the marked line. Avoid touching the container bottom or sides.
- Wait for reading stabilization. Quality meters stabilize within 30-60 seconds. The display will show rapidly changing numbers before settling on a stable value.
- Record the maximum stable reading. Note that readings may decline as hydrogen escapes, so capture the peak value that stabilizes.
- Rinse the probe with clean water after testing and dry gently. Proper sensor care extends meter lifespan.
- Compare results across multiple cycles to establish baseline device performance. Single tests can be misleading due to testing variables.
Choosing a Quality Meter
Not all digital hydrogen meters perform equally. Key features distinguishing reliable models include:
Measurement range: Ensure the meter handles your device’s maximum output. For the Nixcer Pro’s 8000 PPB capacity, select meters rating at least 5000 PPB, though many consumer meters max out around 1500 PPB.
Sensor quality: Higher-end meters use platinum or gold electrodes lasting longer and providing better accuracy than cheaper alternatives.
Calibration options: Look for meters offering manual calibration capability, allowing accuracy restoration as sensors age.
Temperature compensation: Automatic temperature adjustment improves consistency across varying water temperatures.
Display resolution: Meters showing readings to 1 PPB provide more detailed information than those rounding to 10 or 100 PPB increments.
Price generally correlates with quality. Meters under $30 often prove unreliable, while $50-100 models typically offer decent performance for home use. Professional-grade meters costing $200+ provide laboratory-level accuracy but exceed most consumers’ needs.
Pros and Cons of Digital Meters
Advantages: Instant readings (30-60 seconds), no manual drop counting, easy operation requiring minimal technique, readable digital display, rechargeable (no reagent replacement costs), can test repeatedly without consumables, some models store reading history, professional appearance.
Limitations: Accuracy varies dramatically between models, sensors degrade over time requiring replacement or recalibration, many meters max out at 1300-1500 PPB missing high concentrations, battery-dependent operation, more expensive initial investment ($50-150), sensor damage from improper cleaning or handling, affected by dissolved oxygen and other water compounds, some models unreliable in first/last 20% of battery charge.
Digital meters work best for quick verification testing rather than precise measurements, particularly useful for devices producing consistent concentrations where exact numbers matter less than confirming adequate hydrogen production.
Method 3: ORP Meter Testing
ORP (Oxidation-Reduction Potential) meters are widely marketed for hydrogen water testing but provide only indirect, imprecise indicators of hydrogen presence. Understanding their severe limitations prevents misinterpretation of results.
What ORP Measures (and doesn’t)
ORP meters measure electrical potential difference created by oxidizing and reducing agents in water—essentially the water’s tendency to gain or lose electrons. Negative ORP readings indicate antioxidant potential from substances like dissolved hydrogen that donate electrons. However, ORP is influenced by numerous factors beyond hydrogen concentration, including pH level (single biggest factor), dissolved oxygen, mineral content, temperature, and other antioxidants. A water sample might show highly negative ORP due primarily to elevated pH rather than hydrogen content.
Crucially, ORP does NOT directly measure hydrogen concentration. It measures the cumulative effect of all redox-active substances present. Two waters with identical hydrogen levels but different pH values will show vastly different ORP readings. Conversely, water with high pH but low hydrogen might show more negative ORP than neutral pH water with high hydrogen. This makes ORP fundamentally unsuitable for quantifying hydrogen concentration.
The mathematical relationship between hydrogen and ORP follows the Nernst equation, where pH exponentially affects readings. A one-unit pH increase can cause 60mV ORP shift regardless of hydrogen changes. This pH sensitivity overwhelms hydrogen’s contribution to overall ORP, making reverse calculation of hydrogen from ORP values impossible without knowing exact pH and other water chemistry parameters.
How to Use an ORP Meter
Despite limitations, ORP meters can provide rough indicators of hydrogen presence when used with understanding of their constraints.
- Calibrate the meter according to manufacturer instructions using calibration solutions (typically pH 4.0 and 7.0 buffers).
- Measure baseline ORP of your source water before hydrogen generation. Regular tap water typically shows +200 to +400 mV ORP.
- Generate hydrogen water using your device.
- Immediately measure ORP of freshly generated hydrogen water, immersing probe completely and allowing 30-60 seconds for stabilization.
- Record the reading. Hydrogen-rich water typically shows negative ORP between -200 to -600 mV, though this varies enormously based on pH.
- Compare the change rather than absolute values. A shift from +300 mV to -300 mV (600 mV total change) suggests hydrogen presence, but quantification remains impossible.
Interpreting ORP Readings
ORP readings provide only yes/no hydrogen presence indicators, not concentration measurements. General interpretation guidelines:
Positive ORP values (+50 to +500 mV): Likely little or no dissolved hydrogen. Either the device didn’t generate H2, hydrogen already dissipated, or high dissolved oxygen overwhelms hydrogen’s reducing effect.
Slightly negative ORP (-50 to -200 mV): Possible low hydrogen concentration, but could also result from pH alone. Inconclusive for hydrogen verification.
Moderately negative ORP (-200 to -500 mV): Suggests likely hydrogen presence, though exact concentration unknown. Could be 500 PPB or 5000 PPB—ORP can’t distinguish.
Highly negative ORP (-500 to -800 mV): Strong indicator of hydrogen presence, but still no quantification. May also reflect very high pH (9-11 range).
For the Nixcer Pro, fresh hydrogen water should show significantly negative ORP if working correctly. However, you cannot determine whether you’re getting 4000 or 8000 PPB from ORP alone. Negative readings confirm presence; blue reagent or digital meter testing confirms concentration.
Pros and Cons of ORP Testing
Advantages: Quick readings (30-60 seconds), relatively inexpensive ($30-80), easy operation, confirms hydrogen presence or absence, useful for detecting device failures, no consumable reagents, rechargeable for repeated testing, can measure pH simultaneously on combo meters.
Limitations: Cannot measure hydrogen concentration, pH sensitivity overwhelms hydrogen contribution, readings influenced by dissolved oxygen, minerals, temperature, impossible to reverse-calculate hydrogen from ORP, most meters max out around -1000 mV missing high concentrations, requires calibration for accuracy, results vary between meter brands/models, misleading marketing suggests hydrogen measurement capability.
ORP meters work best for basic “is my device working?” questions but should never be relied upon for quantifying hydrogen concentration or comparing device performance.
Advanced Testing: Gas Chromatography
For users requiring absolute precision and scientific-grade validation, gas chromatography represents the ultimate testing method.
The Gold Standard Explained
Gas chromatography (GC) is a laboratory analytical technique that physically separates and quantifies individual gases in a sample. For hydrogen water testing, GC precisely measures dissolved H2 concentration with accuracy typically within ±2-5%, far exceeding home testing methods. The process involves extracting dissolved gases from water into a carrier gas stream, separating them through a specialized column where different gases move at different rates, and detecting hydrogen using sensitive instruments (typically thermal conductivity detectors or pulsed discharge detectors specifically responsive to H2).
Professional labs conducting GC testing use gas-tight syringes and sealed containers to prevent hydrogen escape during sample handling. This controlled environment captures true concentrations without the 20-70% hydrogen loss common in home testing methods where water exposure to air causes rapid dissipation. GC testing also controls for temperature, pressure, and other variables affecting hydrogen solubility, ensuring results reflect actual device output rather than testing artifacts.
Testing services like H2 Analytics specialize in hydrogen water product certification, providing third-party verification independent of manufacturer claims. Reputable hydrogen device manufacturers, including premium brands, use GC testing to verify published specifications and provide certificates of analysis with products.
When Lab Testing Makes Sense
Gas chromatography isn’t practical for routine home testing due to cost ($25-50 per sample), turnaround time (days to weeks), and sample shipping requirements. However, certain situations justify professional testing:
Warranty disputes: If your Nixcer Pro or other premium device shows consistently low home test results, certified GC analysis provides definitive evidence for warranty claims.
Comparison testing: For researchers or reviewers comparing multiple devices, GC eliminates testing technique variables, providing truly comparable data.
Initial verification: One-time GC testing of a new premium device confirms manufacturer claims and calibrates home testing methods against a gold standard.
Product development: Manufacturers use GC extensively during device design and quality control.
Published reviews: Content creators conducting comprehensive product reviews use GC to support claims and add credibility.
For the Nixcer Pro’s 8000 PPB claim, a single GC test verification provides confidence that home testing approximates actual performance. The $30-50 test cost is reasonable compared to the $90-130 bottle investment for users wanting absolute certainty.
Testing the Nixcer Pro Hydrogen Water Bottle
The Nixcer’s Best hydrogen water bottle high-performance specifications make it an excellent candidate for testing verification, and understanding expected results helps interpret readings correctly.
Expected Results by Mode
Under optimal conditions (filtered water at 15-20°C), the Nixcer Pro should deliver consistent concentrations matching its specifications.
Quick Mode (5 minutes):
- Blue reagent test: 35-45 drops (3500-4500 PPB)
- Digital meter: 3500-4500 PPB (if meter handles this range)
- ORP: -400 to -600 mV (rough indicator only)
Deep Mode (10 minutes):
- Blue reagent test: 70-85 drops (7000-8500 PPB)
- Digital meter: May max out at meter ceiling (1500 PPB on many models)
- ORP: -500 to -700+ mV (rough indicator only)
Testing immediately after generation captures peak concentrations. Waiting even 5-10 minutes reduces readings by 10-20% as hydrogen dissipates. The Nixcer Pro’s dual-chamber design separating hydrogen from oxygen/ozone produces cleaner hydrogen water that may show slightly different ORP characteristics than single-chamber devices but delivers higher actual H2 concentrations.
Best Practices for Nixcer Pro Testing
Maximize accuracy when testing the Nixcer Pro by following these protocols:
Water selection: Use filtered or distilled water for both generation and testing. Minerals in hard water can interfere with electrolysis and affect test accuracy.
Temperature control: Test water at room temperature (18-22°C). Cold water holds more hydrogen but affects reagent reaction rates, while warm water accelerates hydrogen escape.
Timing: Begin testing within 30 seconds of completing the generation cycle. Have testing equipment ready before cycle finishes.
Multiple tests: Test each mode (quick/deep) 3 times and average results. Single tests can show ±15% variation due to minor technique differences.
Consistent technique: Use identical procedures each test—same stirring pattern, same drop addition speed, same timing.
Device maintenance: Clean the Nixcer Pro’s electrode chamber weekly as manufacturers recommend. Mineral buildup significantly reduces performance.
Battery charge: Test with a full charge. Low battery (final 20% capacity) may reduce hydrogen generation efficiency.
Container handling: Minimize agitation during testing. Even gentle shaking releases dissolved hydrogen.


